Arduino - 溼度感測器
在本節中,我們將學習如何將 Arduino 板與不同的感測器連線。我們將討論以下感測器 -
- 溼度感測器(DHT22)
- 溫度感測器(LM35)
- 水質探測器感測器(簡單水觸發器)
- PIR 感測器
- 超聲波感測器
- 全球定位系統
溼度感測器(DHT22)
DHT-22(也稱為 AM2302)是一種數字輸出,相對溼度和溫度感測器。它使用電容式溼度感測器和熱敏電阻測量周圍空氣,並在資料引腳上傳送數字訊號。
在本例中,你將學習如何將此感測器與 Arduino UNO 配合使用。室溫和溼度將列印到序列監視器上。
DHT-22 感測器
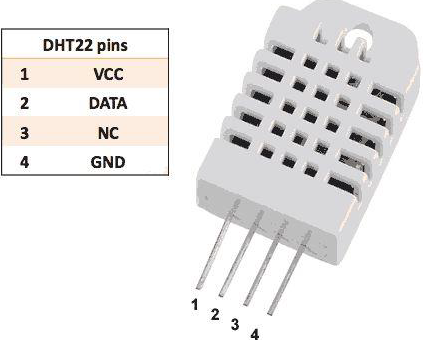
連線很簡單。左邊的第一個引腳為 3-5V 電源,第二個引腳連線到資料輸入引腳,最右邊的引腳連線到地。
技術細節
-
功率 - 3-5V
-
最大電流 - 2.5mA
-
溼度 - 0-100%,準確度 2-5%
-
溫度 - 40 至 80°C,±0.5°C 精度
需要的元件
你將需要以下元件 -
- 1×麵包板
- 1×Arduino Uno R3
- 1×DHT22
- 1×10K 歐姆電阻
程式
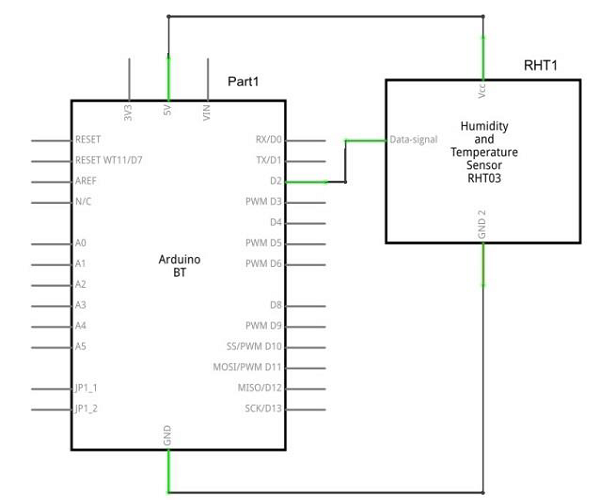
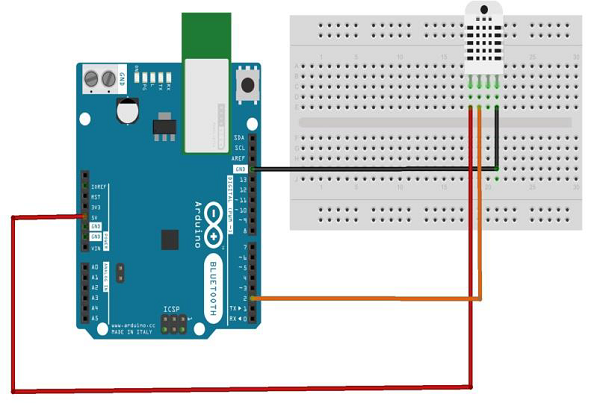
按照電路圖並連線面包板上的元件,如下圖所示。
草圖
在你的計算機上開啟 Arduino IDE 軟體。用 Arduino 語言編碼將控制你的電路。單擊“新建”開啟新的草圖檔案。

Arduino 程式碼
// Example testing sketch for various DHT humidity/temperature sensors

#include "DHT.h"
#define DHTPIN 2 // what digital pin we're connected to
// Uncomment whatever type you're using!
//#define DHTTYPE DHT11 // DHT 11
#define DHTTYPE DHT22 // DHT 22 (AM2302), AM2321
//#define DHTTYPE DHT21 // DHT 21 (AM2301)
// Connect pin 1 (on the left) of the sensor to +5V
// NOTE: If using a board with 3.3V logic like an Arduino Due connect pin 1
// to 3.3V instead of 5V!
// Connect pin 2 of the sensor to whatever your DHTPIN is
// Connect pin 4 (on the right) of the sensor to GROUND
// Connect a 10K resistor from pin 2 (data) to pin 1 (power) of the sensor
// Initialize DHT sensor.
// Note that older versions of this library took an optional third parameter to
// tweak the timings for faster processors. This parameter is no longer needed
// as the current DHT reading algorithm adjusts itself to work on faster procs.
DHT dht(DHTPIN, DHTTYPE);

void setup() {
   Serial.begin(9600);
   Serial.println("DHTxx test!");
   dht.begin();
}

void loop() {
   delay(2000); // Wait a few seconds between measurements
   float h = dht.readHumidity();
   // Reading temperature or humidity takes about 250 milliseconds!
   float t = dht.readTemperature();
   // Read temperature as Celsius (the default)
   float f = dht.readTemperature(true);
   // Read temperature as Fahrenheit (isFahrenheit = true)
   // Check if any reads failed and exit early (to try again).
   if (isnan(h) || isnan(t) || isnan(f)) {
      Serial.println("Failed to read from DHT sensor!");
      return;
   }

   // Compute heat index in Fahrenheit (the default)
   float hif = dht.computeHeatIndex(f, h);
   // Compute heat index in Celsius (isFahreheit = false)
   float hic = dht.computeHeatIndex(t, h, false);
   Serial.print ("Humidity: ");
   Serial.print (h);
   Serial.print (" %\t");
   Serial.print ("Temperature: ");
   Serial.print (t);
   Serial.print (" *C ");
   Serial.print (f);
   Serial.print (" *F\t");
   Serial.print ("Heat index: ");
   Serial.print (hic);
   Serial.print (" *C ");
   Serial.print (hif);
   Serial.println (" *F");
}
程式碼注意
DHT22 感測器有四個端子(Vcc,DATA,NC,GND),它們連線到電路板如下 -
- 資料引腳為 Arduino 引腳號 2
- Vcc 引腳至 5 伏 Arduino 板
- GND 引腳連線到 Arduino 板的地
- 我們需要在 DATA 和 Vcc 引腳之間連線 10k 歐姆電阻(上拉電阻)
完成硬體連線後,你需要將 DHT22 庫新增到 Arduino 庫檔案中,如前所述。
結果
你將在串列埠監視器上看到溫度和溼度顯示,每 2 秒更新一次。