Arduino - LED 亮度變化
此示例演示瞭如何使用 analogWrite() 函式來淡出 LED。 analogWrite 使用脈衝寬度調製(PWM),在開啟和關閉之間以不同的比率非常快速地開啟和關閉數字引腳,以產生淡出效果。
需要的元件
你將需要以下元件 -
- 1×麵包板
- 1×Arduino Uno R3
- 1×LED
- 1×330Ω 電阻器
- 2×跳線
程式
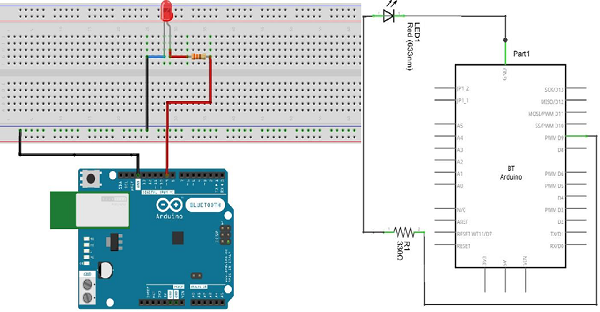
按照電路圖並連線面包板上的元件,如下圖所示。
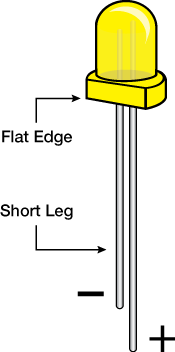
注 - 要找出 LED 的極性,請仔細檢視。兩個腿中較短的一個朝向燈泡的平坦邊緣指示陰極。
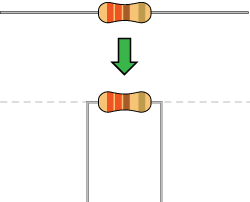
像電阻器這樣的元件需要將它們的端子彎成 90°角,以便正確地安裝麵包板插座。你也可以縮短端子。
草圖
在你的計算機上開啟 Arduino IDE 軟體。用 Arduino 語言編碼將控制你的電路。單擊“新建”開啟新草圖檔案。

Arduino 程式碼
/*
   Fade
   This example shows how to fade an LED on pin 9 using the analogWrite() function.

   The analogWrite() function uses PWM, so if you want to change the pin you're using, be
   sure to use another PWM capable pin. On most Arduino, the PWM pins are identified with
   a "~" sign, like ~3, ~5, ~6, ~9, ~10 and ~11.
*/

int led = 9; // the PWM pin the LED is attached to
int brightness = 0; // how bright the LED is
int fadeAmount = 5; // how many points to fade the LED by
// the setup routine runs once when you press reset:

void setup() {
   // declare pin 9 to be an output:
   pinMode(led, OUTPUT);
}

// the loop routine runs over and over again forever:

void loop() {
   // set the brightness of pin 9:
   analogWrite(led, brightness);
   // change the brightness for next time through the loop:
   brightness = brightness + fadeAmount;
   // reverse the direction of the fading at the ends of the fade:
   if (brightness == 0 || brightness == 255) {
      fadeAmount = -fadeAmount ;
   }
   // wait for 30 milliseconds to see the dimming effect
   delay(300);
}
程式碼注意
在將引腳 9 宣告為 LED 引腳後,setup() 函式就沒有任何其他作用了。你將在程式碼的主迴圈中使用的 analogWrite() 函式需要兩個引數:1,告訴函式寫入哪個引腳,2,指示出要寫入的 PWM 值。
為了關閉和開啟 LED,逐漸將 PWM 值從 0(一直關閉)增加到 255(一直開啟),然後再回到 0,以完成迴圈。在上面給出的草圖中,使用稱為 brightness 的變數設定 PWM 值。每次迴圈時,它都會增加變數 fadeAmount 的值。
如果亮度處於其值的任一極端(0 或 255),則 fadeAmount 將更改為負值。換句話說,如果 fadeAmount 為 5,則將其設定為-5。如果是-5,則將其設定為 5。下一次迴圈時,此更改也會導致亮度改變方向。
analogWrite() 可以非常快速地改變 PWM 值,因此草圖末尾的延遲控制著衰落的速度。嘗試更改延遲的值,看看它如何改變衰落效果。
結果
你應該看到 LED 亮度逐漸變化。