wxPython 選項卡
雖然我們沒有為 wxPython 系列大量使用物件導向,但出於簡單的原因,我們無法繞過它。在本教程中,你將學習如何使用 wxPython 建立選項卡介面。
類 Mainframe 用來建立框架,就像我們在前面的例子中所做的那樣。其他類是選項卡的內容。我們在主框架中建立了一個面板和筆記本(標籤夾)。然後我們建立 tab 物件:
tab1 = TabOne(nb)
tab2 = TabTwo(nb)
...
我們使用以下方法附加到標籤夾:
nb.AddPage(tab1, "Tab 1")
nb.AddPage(tab2, "Tab 2")
...
完整程式碼:
import wx

# Define the tab content as classes:
class TabOne(wx.Panel):
    def __init__(self, parent):
        wx.Panel.__init__(self, parent)
        t = wx.StaticText(self, -1, "This is the first tab", (20,20))

class TabTwo(wx.Panel):
    def __init__(self, parent):
        wx.Panel.__init__(self, parent)
        t = wx.StaticText(self, -1, "This is the second tab", (20,20))

class TabThree(wx.Panel):
    def __init__(self, parent):
        wx.Panel.__init__(self, parent)
        t = wx.StaticText(self, -1, "This is the third tab", (20,20))

class TabFour(wx.Panel):
    def __init__(self, parent):
        wx.Panel.__init__(self, parent)
        t = wx.StaticText(self, -1, "This is the last tab", (20,20))


class MainFrame(wx.Frame):
    def __init__(self):
        wx.Frame.__init__(self, None, title="wxPython tabs example @pythonspot.com")

        # Create a panel and notebook (tabs holder)
        p = wx.Panel(self)
        nb = wx.Notebook(p)

        # Create the tab windows
        tab1 = TabOne(nb)
        tab2 = TabTwo(nb)
        tab3 = TabThree(nb)
        tab4 = TabFour(nb)

        # Add the windows to tabs and name them.
        nb.AddPage(tab1, "Tab 1")
        nb.AddPage(tab2, "Tab 2")
        nb.AddPage(tab3, "Tab 3")
        nb.AddPage(tab4, "Tab 4")

        # Set noteboook in a sizer to create the layout
        sizer = wx.BoxSizer()
        sizer.Add(nb, 1, wx.EXPAND)
        p.SetSizer(sizer)


if __name__ == "__main__":
    app = wx.App()
    MainFrame().Show()
    app.MainLoop()
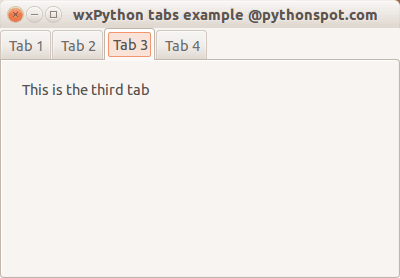
輸出: